Popcorn ceilings, once a popular interior trend, are now considered outdated by many homeowners. These textured ceilings, also known as acoustic ceilings, were used extensively from the 1950s to the 1980s due to their ability to hide imperfections and absorb sound. While removing a popcorn ceiling can significantly modernize a space, the process can be tricky, especially for those new to DIY home improvement.
Here are the most common mistakes to avoid when removing popcorn ceilings:
Not conducting an asbestos test prior to removal
Ignoring to test for asbestos before removing a popcorn ceiling is one of the most important blunders you can make. Popcorn ceilings that were put in before the middle of the 1980s can contain asbestos, a hazardous substance that breathing in can have major negative effects on one’s health. When asbestos is disturbed without taking the necessary safety measures, dangerous fibers may be released into the air, endangering everyone in the house.
Solution: Check for asbestos in your ceiling before starting. Although DIY asbestos test kits are available, hiring a professional to gather a sample and transmit it to an approved lab is the safest course of action. It is imperative that the ceiling be taken down by certified experts with experience in asbestos abatement if asbestos is present.
Failing to Properly Protect the Space
Popcorn ceiling removal is a messy job that can leave your space covered in dust and debris. Failing to protect the room and its contents is a common mistake that can result in a long and difficult cleanup process. To avoid this, it’s essential to properly prepare the space by covering floors, furniture, and vents with plastic sheeting or drop cloths. One of the common mistakes with popcorn ceilings is neglecting to turn off the HVAC system, which can spread dust throughout your home. Additionally, failing to test for asbestos before starting the removal process is another critical oversight that could pose serious health risks.
Solution: Before starting the project, take the time to prepare the room. Remove all furniture, light fixtures, and decor, or cover them with plastic sheeting. Use drop cloths or tarps to cover the floors, and tape plastic sheeting to the walls to protect them from dust and water. Don’t forget to close off vents, windows, and doorways to prevent dust from spreading to other areas of your home.
Ignoring the Water Soaking Step
Applying water to soften popcorn ceiling prior to scraping is one of the best methods for removing it. In their haste to finish the project, some DIY neglect this step and try scraping the ceiling dry. This may result in uneven removal, harm to the drywall underneath, and needless aggravation.
Solution: Lightly sprinkle the ceiling with water using a spray bottle or garden sprayer, and let it soak for ten to fifteen minutes. By doing this, the texture becomes softer and easier to scrape off without causing damage to the drywall underlying. Take care not to oversaturate the ceiling since this could lead to drywall damage or a messy floor.
Not Wearing Proper Safety Gear
Popcorn ceiling removal can create a lot of dust and debris, especially if the ceiling contains asbestos or lead-based paint. Failing to wear the appropriate safety gear can expose you to harmful particles and lead to respiratory issues or other health problems.
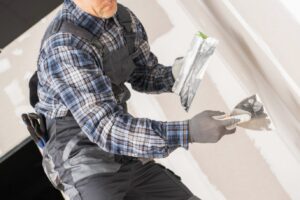
Solution: Always wear protective gear when removing a popcorn ceiling. This includes a dust mask or respirator, safety goggles, and gloves. If asbestos or lead is a concern, you should use a HEPA-filtered respirator and wear disposable coveralls to prevent contamination. Safety is paramount during this process, so never skip the necessary precautions.
The Inappropriate Tools
The removal process can be more difficult and there is a greater chance of damage to the ceiling or the drywall underneath if the incorrect equipment are used. Using a small, dull scraper is a common mistake that can lead to uneven removal and drywall gouges.
Solution: Purchase the appropriate tools for the task as a solution. The removal process will be simpler and more effective if you use a specialist popcorn ceiling scraper or a wide, sharp putty knife. Certain popcorn ceiling scrapers even have add-ons that allow you to gather debris while you scrape. After the texture is removed, a drywall taping knife (at least 6 inches wide) can be used to level up any uneven areas.
Conclusion
A satisfying undertaking that can significantly refresh the appearance of your house is removing a popcorn ceiling. But in order to avoid typical mistakes that could lead to expensive repairs, dangerous situations, or subpar outcomes, it’s critical to approach the process attentively. You may guarantee an effective and secure popcorn ceiling removal by checking for asbestos, utilizing the appropriate equipment, securing your area, and adhering to the right procedures. Still if you have some confusion then you can hire profesionals from Drywall Medic, here are their contact details:
- Victoria, BC: #136 – 2936 Amy Rd, Victoria, BC, V9B 0B2, Contact Number- 250-880-8849,
- Vancouver, BC: 6894 192 St, Surrey, BC V4N 0B7, Contact Number- 604-913-4656