Popcorn ceilings, also known as acoustic or textured ceilings. They are known for their bumpy, textured appearance and sound-dampening properties. However, these ceilings can be prone to damage from water leaks, wear and tear, and general aging. Repairing popcorn ceilings can be a daunting task, especially for those who are inexperienced. To ensure a successful repair, it’s important to avoid common mistakes that can lead to poor results or further damage. This article will guide you through the common mistakes to avoid when repairing popcorn ceilings and how to do it correctly.
Not Testing for Asbestos:
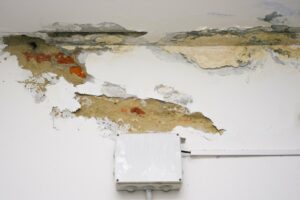
One of the most important errors is to begin any repair work without first checking for asbestos in the popcorn ceiling. Before the 1980s, popcorn ceilings might have included asbestos, which is dangerous to your health if disturbed. If your home was built before the 1980s, it is crucial to have a professional conduct an asbestos test before proceeding with the repairs. Disturbing the material without precaution can release harmful fibers into the air, posing serious health risks. Always prioritize safety tips for repairing ceilings, such as wearing protective equipment and ensuring proper ventilation to minimize exposure to potential hazards.
Solution: Have a professional test a tiny sample of the ceiling for asbestos before beginning any repair work. If asbestos is discovered, it is imperative to remove or encapsulate the asbestos-containing material safely by hiring a licensed abatement professional from Drywall Medic.
Skipping Surface Preparation
Neglecting to prepare the ceiling surface properly before making repairs can lead to poor adhesion of patching materials and paint, resulting in an uneven and unprofessional finish.
Solution: Thoroughly clean the area to be repaired by gently brushing off dust and debris with a soft-bristled brush or vacuuming with a brush attachment. Ensure the surface is dry and free from any loose material before proceeding with repairs.
Using the Wrong Materials:
Mismatched texturing, inadequate durability, and undesirable outcomes can emerge from using the wrong or unsuitable materials for the repair.
Solution: Use materials made especially for popcorn ceilings. Invest in a popcorn ceiling restoration kit, which usually comes with patching materials and texture spray that match the original texture of the ceiling. Make sure the items you select are both high-quality and work well with the current ceiling material.
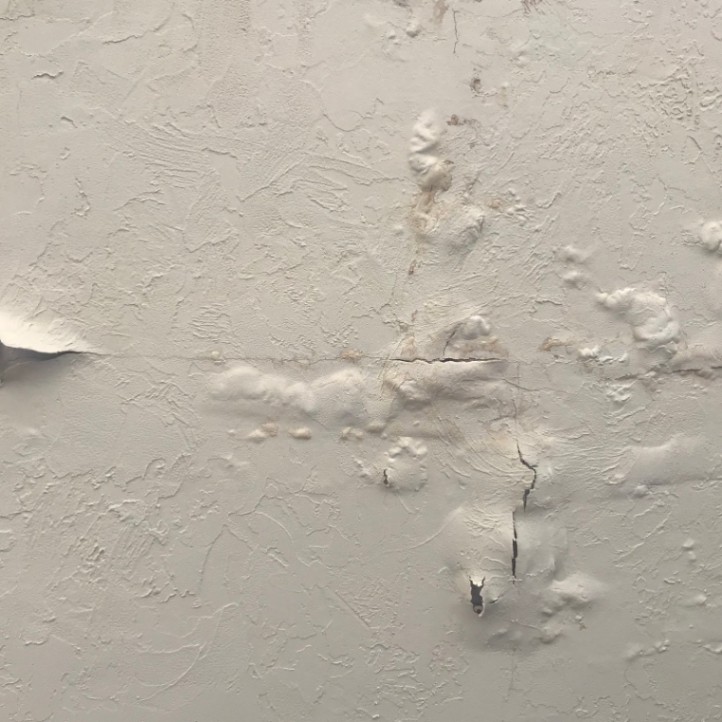
Not Blending the Texture Properly
Applying new texture without blending it properly with the existing ceiling can create visible patches and inconsistencies that detract from the ceiling’s overall appearance.
Solution: When applying the new texture, feather the edges to blend seamlessly with the surrounding area. Practice on a piece of cardboard or a hidden section of the ceiling to get a feel for the application technique before working on the visible area. Use a light touch and multiple thin layers to achieve a consistent texture.
Ignoring the Importance of Primer
If a primer is not applied before painting the repaired area, paint may not adhere properly, peeling and uneven coloration may ensue.
Solution: Prior to painting, always coat the repaired area with a premium stain-blocking primer. By keeping moisture and stains from penetrating the paint and improving adherence and coverage, the primer aids in sealing the patch.
Incorrectly Matching Paint Color
Failing to match the paint color correctly can result in noticeable differences between the repaired area and the rest of the ceiling.
Solution: Take a sample of the existing ceiling paint to a paint store for color matching. If an exact match is not possible, consider repainting the entire ceiling to ensure uniformity. Use ceiling-specific paint for the best results.
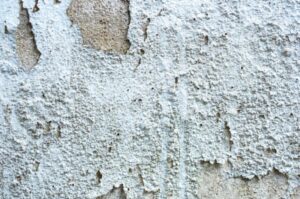
Applying Too Much Water
Using too much water when removing damaged popcorn ceiling portions might result in an excessively saturated texture, which can cause additional damage and make retexturing more difficult.
Solution: Using a spray bottle, lightly sprinkle the area with water to soften the texture without saturating it. After allowing the water to seep in for a few minutes, use a putty knife to carefully scrape away the damaged area. Take care not to puncture the drywall beneath.
Overlooking Safety Precautions
Neglecting safety precautions, such as wearing protective gear and ensuring adequate ventilation, can expose you to harmful dust and fumes.
Solution: Always wear a dust mask, safety goggles, and gloves when working on popcorn ceiling repairs. Use a drop cloth to cover furniture and floors, and work in a well-ventilated area to minimize exposure to dust and fumes from patching compounds and paint.
Rushing the Drying Process
Painting or applying extra texture layers before the preceding layer is completely dry might lead to an untidy, uneven surface and weaken the integrity of the repair.
Solution: Give yourself enough time for drying in between each repair step. For information on the drying times of primers, paints, patching compounds, and texturizing sprays, refer to the manufacturer’s instructions. A better outcome will be guaranteed with patience.
Conclusion
Popcorn ceiling repair might be difficult, but by avoiding typical blunders, you can get a successful and attractive result. Prior to starting any repairs, always test for asbestos, thoroughly prepare the surface, and use the appropriate tools and methods. Put safety first, take your time, and don’t be afraid to ask for expert assistance when you need it. You may preserve the attractiveness of your home and bring back the original charm of your popcorn ceiling by following these instructions. But still if you want professional help then you should consider the experts from Drywall Medic, here are the contact details:
- Victoria, BC: #136 – 2936 Amy Rd, Victoria, BC, V9B 0B2, Contact Number- 250-880-8849,
- Vancouver, BC: 6894 192 St, Surrey, BC V4N 0B7, Contact Number- 604-913-4656